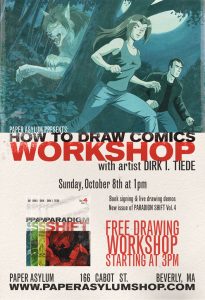
 This weekend I taught comics workshop at the fantastic comic shop, Paper Asylum, and I’ve decided to use the event as a way to get this blog started.
Over the many years I’ve been drawing comics, I’ve found that I enjoy sharing what I’ve learned about the process and craft of writing, illustration and visual storytelling as much as actually creating my stories. Back when I was working on the first Paradigm Shift graphic novel, I created a process tutorial, which ended up serving as the basis for the first workshops I brought to comic & anime conventions after publishing that first book in 2003. (Egads! Was it already so long ago?!) I eventually included it as bonus material in the second edition of the book.
However, it being 2017, that tutorial is out of date. Not only have the tools I’m using to create my comics changed, but I’ve learned so much more that I would like to expand upon. I’ve updated my workshop to reflect those changes and I will share it with you here. Today, I’ll give you a quick overview of the topics I’ll be covering both in the workshop and in this series over the next few weeks.
The Process:
-
- Tools: Traditional vs Digital
- Creating Characters
- Character Design & Figure Drawing
- Story & Script
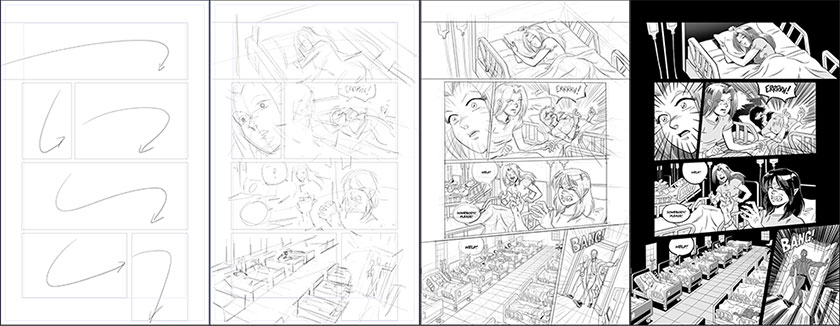
- Thumbnails, Layout & Lettering
- Pencilling 1: Characters
- Pencilling 2: Backgrounds
- Inking
- Screentones
- Cover Design
- Conclusion: Post Production & Printing
Tools:
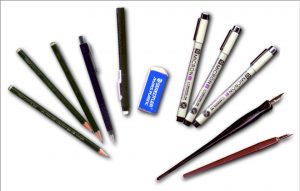 The biggest change between the tools I used for the first three books of Paradigm Shift and what I’m doing now is I’ve drunk the Kool-Aid and gone all digital. I resisted making this change for many, many years in part because I liked the look of traditional inks, and I enjoyed having a physical page on bristol board when I was finished. However, after developing a repetitive stress issue in my drawing arm, I realize that hunching over while sitting at a drawing desk and making tiny motions with my wrist was not doing me any favors. So, after taking some time off from drawing, I started painting—with real paint and brushes. I also started experimenting with Sumi ink and Japanese horsehair brushes. While retraining my arm (and attitude), I discovered that painting helped satisfy my desire to create an art object. It also taught me that I enjoyed using my whole arm to create brush strokes. So, when I returned to drawing comics, I found it much easier to draw on a screen where I could zoom in, rotate and use my whole arm to create my drawings in way that is easier on my body.
Now my tools of choice (for drawing comics, at least) are CLIP Studio Paint (formerly Manga Studio 5) and a Wacom Cintiq 22HD. What sold me initially was the inking tools, which blow Photoshop out of the water (to no one’s surprise.) But what keeps me coming back is the perspective rulers. They make the process of creating all the fun backgrounds I love to draw so fast and easy! That and the seamless compatibility with PSD files means I was able to just plug it into my workflow from the beginning. However, don’t worry if your budget doesn’t allow for fancy hardware. Everything I’m going to show in this series will translate as basic concepts to traditional tools and even most drawing software and tablets.
I get into more detail on tools here.
Characters:
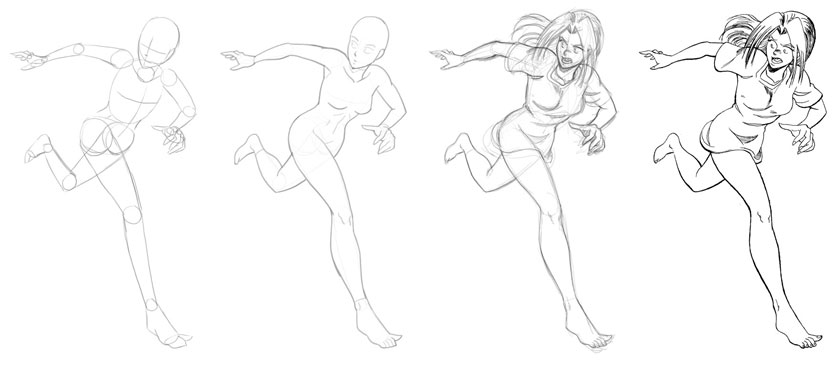
In this two-part series, we’ll see the roots of where my character design style comes from, and how figure drawing and animation play a huge role in drawing characters with life. First, we’ll delve into the origins and evolution of my own characters, and examine the artists that deeply influenced my style.
Then we’ll dig into the drawing itself, examining the processes I use to draw consistent, dynamic, characters on the page. We’ll look at gesture, anatomical construction, action poses, and hands, and the role that figure studies play in refining and improving character work.
Story & Script:
I left this part out of the original process tutorial, aside from a brief glimpse at a page of script. However, I feel it’s a huge oversight, since the story is the thing that ultimately drives me to create my work in the first place. When I decided to return to comics, it was the story that I examined first. Story was also the thing I found most frustrating about publishing a webcomic—my process did not leave any time to examine the work as a whole and go back to edit & refine problematic scenes. In moving to working on the book as a whole, I now have a writing method that works.
We’ll talk about the creative process from getting that initial idea down on paper as an outline or first draft, and how a separate revision and editing stage can help shape the story into a satisfying final form. We’ll also cover a bit on story structure and using an outline to help craft a final revision.
Layout, Thumbnails & Lettering:
 This is what I consider to be the heart of comics. Characters alone are just drawings. Written stories are prose at best. And what comes after is simply illustration, no matter how crude or refined the drawings are. It’s in the layout phase is where the magic of comics happens. We decide what to draw, in what sequential order, and where the words go. That interplay of images and words back and forth on the page is what makes comics a unique art form, and getting your ideas down clearly is the key part of this phase.
We’ll take a script and turn it into a layout and touch on different ways panels can transition from one to another. I’ll show you how the eye flows through a page layout, and how you can use that to help composition. And how thumbnailing whole scenes (or issues! or books!) can be a huge help in creating a larger work. Lastly, we’ll look at why lettering your page before you pencil is a good idea.
Pencils:
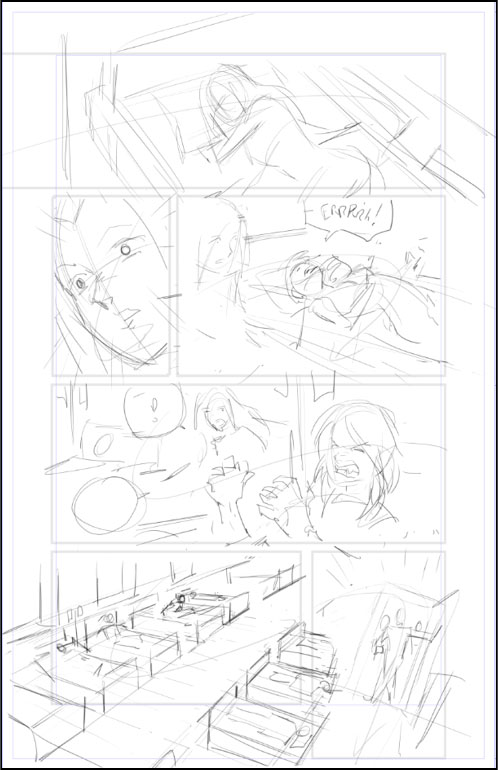
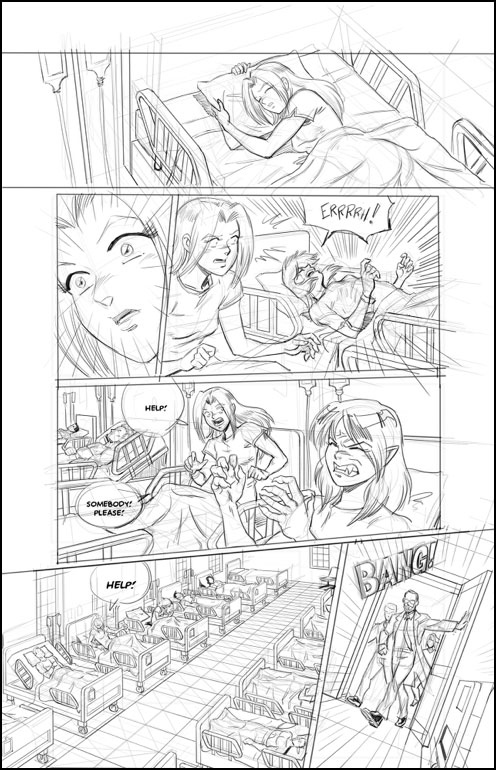 From here on, it’s all about cleaning up and refining the images. Using the thumbnail as a starting point, I’ll do a rough drawing over each panel, and then do a final pass to clean up anatomy, nail down perspective and add the important details. But while we nailed down all the important elements in the thumbnail stage, now we must flesh out the details of the illustrations.
We’ll cover the process in two parts. The first will return to characters, revisiting anatomy and proportions, and using reference photos effectively to help flesh out a scene–even using selfies!
The second, will cover drawing backgrounds, using references and basic perspective to create believable spaces for characters to inhabit and how to insert them into your backgrounds. I’ll also show you how I use 3D tools like Sketchup to create environments (or “sets”) for places that I want to visualize more fully and will recur throughout a story.
Inking:
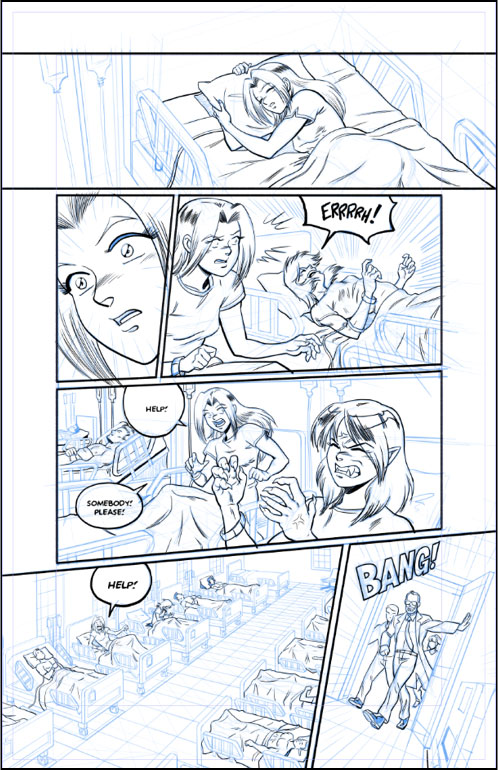 My favorite part of the whole process! It’s also the hardest to talk about. We’ll look into the pros and cons of traditional vs digital tools and what I’ve learned from working with both.
We’ll also cover the techniques I’ve learned over the years to produce solid, clean line work and how to create some special effects like classic manga “bursts” and speed lines.
Screentones:
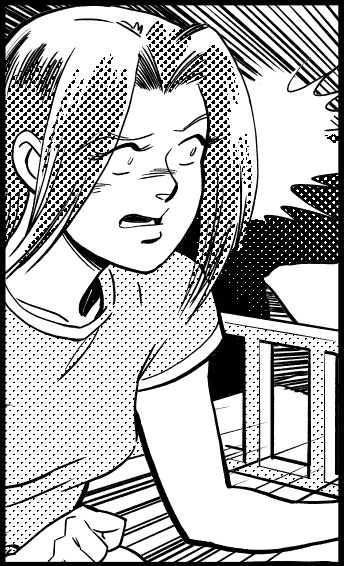 Good screen tone work is all about two things: TEXTURE and VALUE. I love the look of screen tones in black and white comics because it creates a wonderful texture to the art work. It’s also bloody difficult to reproduce well at low resolution, which is why the Paradigm Shift webcomic pages were always in grayscale instead the toned look I actually desired.
We’ll dive in and look at how to create strong tone work, using black effectively and creating custom textures to use as patterns to add detail and mood to a comic.
Cover Design:
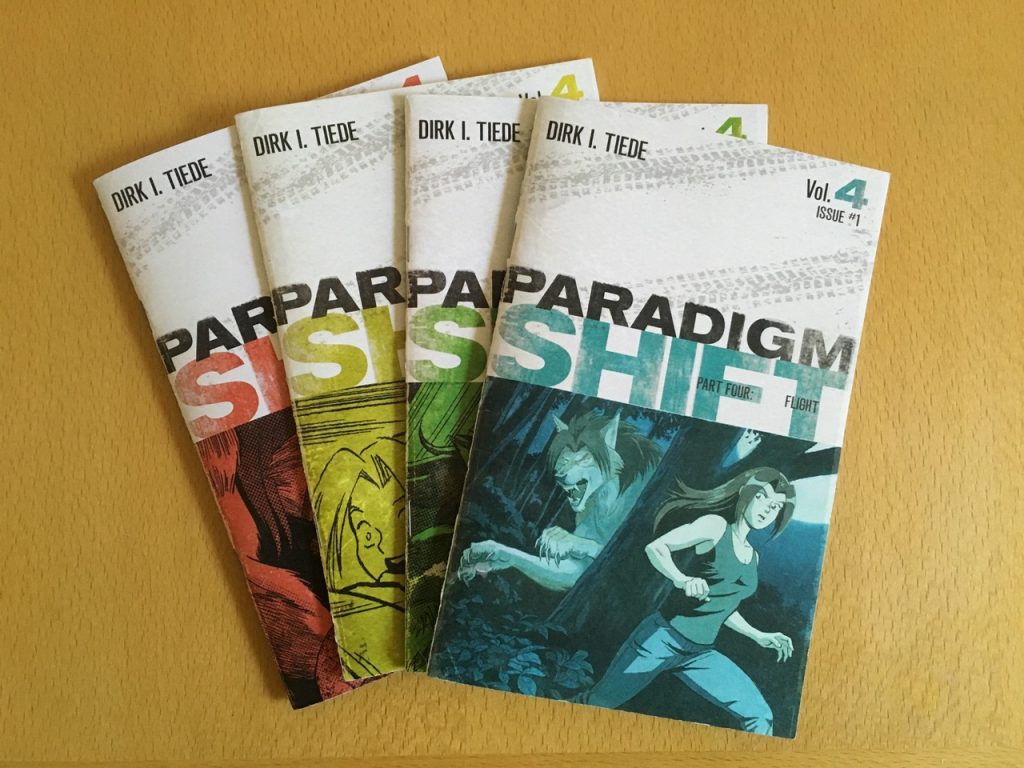
 One of the best parts of coming back to Volume Four was designing a new look for the series. I’ll show you how old jazz records inspired new ideas for the design and the process I used to paint the cover for the book. I’ll also show how I used custom textures to create the weathered, vintage look of the new covers.
Post-Production:
Finally, the end result of all the hard work is at hand: a printed comic! However, the comic needs to be assembled first. We’ll look at the process of putting all the pages together in as layouts, the visual design of a book, and prepping it for print. Finally, once the pages are back from the printer, I’ll show you how to assemble an awesome, professional-looking minicomic.
I look forward to bringing you this series! If you’d like to keep up to date on the new tutorials, please join my mailing list: